Author Archives: Arne

Limiting native iso is wrong

I am one of the guys insisting that with year 2020, while the new twenties begun, a new decade begins with 2021. The first year AC was year 1. Math cannot be cheated.

Take this blog entry in this light.

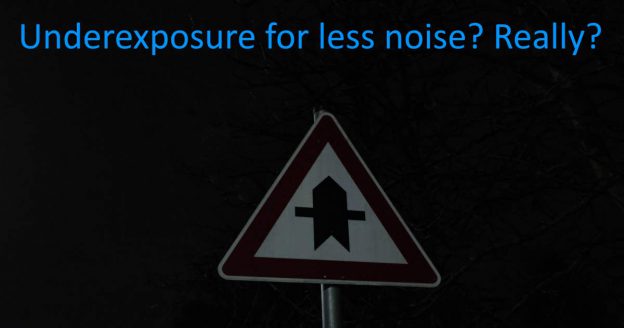
You cannot cheat the exposure

Using the Raw format one can push the exposure and recover shadows quite a lot. Some think it would be good to limit iso in order to prevent getting too much noise and then to use the Raw file to recover dark areas. But of course this increases the noise. The result is slightly more noise than if optimal native iso would have be used to begin with.

If lowest noise is the prime concern, one should rather pull the exposure (recover highlights) using Raw. Of course this has to be balanced with clipping, one should not expose so bright that one gets clipping where not wanted.

If there would be somehow a trick to get less noise with pushing an underexposed image, by now it would be done in the camera already in order to get good reviews.

Detailed settings discussion

If the minimum shutter setting is a bit too fast for what it is possible and the max iso value set just a bit below the optimal iso while you use the aperture priority mode, the iso limitation results in longer shutter speed and gets you an image with less noise. But in practice this situation rarely occurs, where an iso limit just compensates for an overly cautious minimum shutter speed.

If in low light the camera is used handheld, one can just adjust the minimum shutter speed in order to first take some shots with fast shutter, and then try to push the luck with somewhat longer exposure.

If timing is critical, one cannot take multiple shots until it works out. You probably don’t want to deal with shake blur in the photo, so you probably want to use even quicker shutter speed than normally in order to really not risk any shake blur. Using an iso limit within the native iso range does not help, as with fixed shutter speed the image is underexposed and while some underexposure can be fixed in post, using native iso would yield a slightly better result.

For best sharpness one usually stops the aperture down. Full aperture often includes less than ideal sharpness but if weighted against iso noise, having some sharpness issues caused by the lens is normally better than having the sharp image drowned in noise. But if a certain depth of field is needed to get every important sharp, you probably prefer noise to having an important image part out of focus, or to risk motion blur for the whole frame.

More about iso choices

The higher the iso, the less dynamic range is provided. Using an underexposed image also reduces dynamic range though. If highlight recovery is the main concern, meaning if you look only at the top-end of the range, you might want to live with the disadvantages of an underexposed Raw, but that is a different discussion.

I suspect, this is how some decide their maximum tolerable iso: They look on 1:1 crops and might say iso 3200 is still good, 6400 not so much, 12800 clearly compromised so I use 6400 as max iso.

But at the end of the day the whole photograph counts, not a 1:1 crop. A sensor with high pixel density gives you more noise (larger random color offset) per pixel but not necessarily for the whole image. A 1:1 crop might let a sensor with higher pixel count look worse but that does not tell you something about the photograph as a whole.

In almost all cases, the published photograph will be downscaled anyway. This also reduces noise.

Some sensors are said to be iso invariant in that pushing in post or using higher iso in the camera does not make a noticeable difference. For that sensors, limiting iso and getting an underexposed results does not hurt, but does not help either. In my experience, even “invariant” sensors are in fact slightly variant, so using native iso is still, if just a tiny bit, better than pushing an underexposed Raw.

This blog entry is about the native iso range, not about an extended range offered by some cameras. Photographing with in-camera extended high iso is comparable to pushing a Raw in post, meaning no advantage but also not disadvantage.

It appears some think that extended low modes, like “Low-1” for example converting a base-iso 100 to iso 50, would be useful because the lower the iso the better. While that would actually slightly decrease noise, it also risks blown-out highlights because all is done here is using an overexposed image with digital exposure correction.

Dealing with noise

On film, higher iso values affect all levels of brightness. With 135-format film you can change iso only with using a new roll, and iso 800 film is substantially more expensive than iso 400. This is why I use iso 400 film even in low light and have the laboratory push it. That gets more noise than paying up for iso 800 film but it saves me a lot of bucks.

In digital, such cost concerns don’t exist. Digital photographs show noise mostly in dark areas, making it even easier to deal with. A contrast curve can pull shadows, making those levels darker and conceal or reduce the noise there. A digital noise filter applied for the whole frame then can be used with less aggressive settings.

Addressing noise in color and brightness separately allows to remove the most distracting noise artifacts in color, while keeping most details and with it some noise in luminance. Even more sophisticated tools exist, but I am not sure why some noise is seen as bad in the first place. Perhaps because newer technology provides less noisy images and is advertised to be desirable.

Of course, the lower the light, the more noise, up to a level where it removes too much detail. But limiting auto-iso within the native iso range or using a manual iso setting leading to underexposure does not help you to get a result which shows more detail.

Where the X100F is good at

2019: By now, the X100F seems to be almost outdated, with a successor on the horizon. Time to move on? Of course not!

In 2019, the D7500 became my main camera. Still not doing any paid work, though for two events I got tipped later.

The X100F saw considerably less use that year – in a sense because it does not pose a challenge. With the Nikon, I now worked out a Raw-based processes to get good skin tones, while I still struggle with Jpeg. The Fujifilm is excellent for skin tones even using Jpegs straight out of the camera.

And there is no lens choice. No what-if, no what-about, no should-I-rather. This fixed lens is not a serious limitation. Even without panorama stitching or cropping in post, Jpeg mode offer three common and useful fields of view. Now I see one could rise any say “But the image quality of digital zoom is not as good”. As if every photo must be taken with the optimal resolution.

I would prefer digital crop to digital zoom, but still use the digital zoom. As for wide shots, the lens is nicely wide. Not ultra wide, which would get boring quickly.

Taking Raw photos is almost a disadvantage with this camera. Again I see someone would rise, and in a high-pitch and determined tone, lecture me about things possible only with Raw.

For me it is not so much about what is possible. Rather about what is done.

City after sunset, taken December 31st 2019. Camera’s digital zoom to 70 mm equivalent.

If my photos which I create for no money would rely on being shot Raw, I would be more a digital artist than photographer. If the photos don’t rely on Raw, why put that extra time into it? Because of more facebook likes? Or because even in film times, images were manually developed in order to optimize the outcome? Indeed, pros did it. I was a consumer and went to a drug store, getting the prints a couple of days later.

Of course, certain events justify Raw usage. Midsummer night I  switched to Raw. All images from that day shown here are still a Jpeg exports done by the camera.

Long exposure on June 22nd.

Thing like sensor quality analysis. Or lens sharpness analysis. As if a bit of noise, or less that mathematically possible detail resolution ruins an otherwise good photograph. If you cannot improve in any other way, if you already consistently capture the best moment, if your composition is impeccable every single shot, I would see why you look at your images in 1:1 pixel zoom. Why would I care about the accuracy of some pixels if the photograph itself has issues?

With the X100F I took a couple of group shots, some of them printed with the Instax SP2 as a quick small gift. The X100F also served as camera for casual gatherings when I want to have something not as big as a DSRL. Faces are more relaxed looking at this camera instead into a large lens which appears to be a high-performance skin-issue detector.

On trips, the camera served as machine to record visual memories.

Faux macro shot

When taking it to a cherry blossom area, I caught some bees in flight. It is not an action camera but focus is quick enough for my practical needs. I took wide-angle shots and near-macro shots, the latter amplified with digital zoom. I also used the fake macro capability for other stuff like those mini fungus. Not fully sharp but still a lot of detail.

The X100F with Acros simulation got me some excellent photographs. Some portraits looked so good that color would be a distraction. With Classic Chrome selected, I went on a city history trip guided by one of my colleagues. Took too many pictures but the ones I selected to show the other colleagues, are straight out of camera.

I used the camera to photograph a politician. Being in the front row, still no-one mistook me for the press. And another photo-shooting of people in summer, ladies in dirndls. The shots had to be good, so I played safe and used the X100F.

For midsummer night, the X100F was only a backup, but vital to document the shooting event itself. And on the way, I got this picture of noctilucent clouds.

These clouds were lit after sunset on midsummer night

I used the camera while being blindfolded for a game. Now I have weird pictures showing other participants, also blindfolded.

First on foremost I like the camera for travel. Bohek options are limited – oh no, now I get snarky remarks from the friend how just bought a new fast which weights more than the X100F camera and – who thought of that? – gets more background blur.

Also no zoom, while everyone knows that one must of course carry a zoom in order to not waste any megapixels in crop. Okay, for the highest facebook resolution, a crop would yield a 100 mm equivalent lens, or for mobile uploads, digital crop gets you to some 210 mm. But every picture taken at any point in time for any reason must be of commercial-grade quality, or you are just a beginner. Imagine you are out there, and in the distance is something you never went to so you have no emotional connection, and to get it big on a photo you have to crop much so that one cannot create a sharp 36×24 inch print. What a shame. Quick, let’s load our photo backpack,

But first, let us discuss which seven of our eight lenses we put into it. Yes, all that is what I need on travel.

More than one system

With otherwise using DSLRs, I like the optical viewfinder option of the X100. An electronic viewfinder can be useful, or a combination thereof, optical finder with a small digital preview. Everything is offered by the X100F.

Articulating screen? I have a bigger camera for that. And yes, I use DSRLs on some travels, too. Sometimes I shoot even Raw.

What do I actually need? Feature-wise, a Nikon FM2: It shows shutter speed and aperture in the viewfinder, and iso on the camera back if you use the cardboard holder. Shutter speed ranges from 1 second to 1/4000 with a bulb option available, flash sync up to 1/200. If offers an assistant – here a split-screen – for focus. There is an electronic light meter. And a shutter release button. The camera even shows how many exposures were taken and thus one knows how many are left.

The X100F is not free of issues. Autofocus sometimes misses completely and falsely confirm the focus, auto-whitebalance used in landscape is prone to produce a purple tint. The lens however is excellent, producing sharp pictures at almost all settings, and nice aperture stars at f/4.

The camera’s focus is not as snappy as known from a DSLR, some shots I took in a boxing class were not optimal. But many turned out to be good.

When looking through this year’s photo taken with the camera, I relived many events. Looking at the DSLR photos, I often also remember the struggle to carry and manage the gear.

Bee and cherry blossom

Having an X100F does mean other cameras are superfluous to me. In fact, I went into the DSRL world only about one and a half year after buying the X100F early in 2017.

Still using the Fujifilm, like today on new year’s eve.

A sharp moon photo

This blog post describes how I got this photo. In order to reproduce, you need your camera and a long tele lens, I also assume you have image editing software able to read Raw files, and to apply common adjustments.

This is the result:

Here is the original Nikon D5600 NEF file. You can download that file and use it as you like except claiming ownership. You can use it commercially if you want as long as you credit me, Arne Seifert, and also link to “http://www.aths.net/a-sharp-moon-photo”.

For the processed images in this article, as all of the Jpeg images in my blog, I claim full copyright. Please don’t use them.

Get experience

The moon is so bright it could be shot handheld if the lens has VR, but we go for the best result. That means, please use a tripod. If the lens has VR, disable it to avoid accidental “correction” when none is needed. I think by now VR is smart enough to not activate accidentally but we are not taking risks here.

On the camera, configure the selftimer. Use a delay of some seconds, and set it to do a couple of shots in succession with some seconds delay in-between.

I also use exposure delay mode, so that after the mirror moved up, the camera waits a bit before releasing the shutter. The vibration caused by mirror motion is thus gone.

Set the camera to full manual exposure including manual iso. For now, begin with 1/100 s, f/10, iso 100. For the Jpeg profile use the flattest you have available. Set the camera to Raw recording (the Jpeg profile still applies to the included Raw preview.) Make sure that when you are reviewing a photo zoomed in, that your camera gets you a full-resolution review even with Raw. Otherwise, use Jpeg+Raw just to get a full-resolution review.

Enable live-view, configure it to shoot on tapping if the camera has a touch screen. Turn the lens to the shortest setting, adjust the camera position until the moon is in the center of the screen. You notice after changing the angle when you then fix the position of the tripod mount, it still moves a bit until it settles down. You have to compensate for that and fix the mount position with the moon a bit higher because during or even after fixing, the camera stills moves a bit. There are tripods available for astronomers which can be oriented with wheels, allowing delicate changes of direction after mounting. But we work with consumer-grade gear.

Now turn the lens to the longest setting.

For focus you have two choices:

  • Zoom in via live-view, use autofocus as often as you like until the image appears to be the sharpest. Then switch to manual focus and keep it.
  • Use autofocus all the time

The former method gets you consistent results, where for the latter I sometimes get images slightly out of focus. I still recommend the latter, because the earth atmosphere between lens and moon is not static. Warmer air moves up, and because density depends on temperature, mixing air of different temperatures causes changes in how it interacts with light. Using autofocus all the time, you have to live with slight waste because somehow it might not always hit perfectly but overall it adapts to changing conditions. Also you might be outside for a while, with the moon moving on the sky, meaning the thickness of atmosphere changes over the night. Since air interacts with light, if only very little, we can use autofocus to have the camera adapt.

Begin the shooting. Then review the results. The earth turns so fast, the moon will wander to one of the edges. Consider this for the next shooting. Get the moon to a place that during the shooting, it goes through the center of the image. The lens usually gets you the best resolution in the image center.

Very important, please check exposure in the review. You might need to adjust it. If you have a very long lens, you might want to shorten the shutter speed, like to 1/200 s, because the longer the lens, the quicker the moon moves. Compensate shutter speed with iso (in this case, iso 200) instead of aperture. This is because most lenses have their sharpness peak if stopped down. This is especially true for most tele zoom at the long end.

Do all these experiments to learn how you get the best results with your gear. You can also do some basic processing of your images, to see what is possible.

Get the perfect night

When the moon is high it means there is less atmosphere between the moon and the lens. The chance of disturbances is smaller. We don’t photograph a rising or setting moon if we want the best quality. The moon subjectively appears to be larger if close to the horizon but of course the actual size is the same.

We also need night with no clouds. It should be cold, because hot air moves which interferes with image sharpness.

On paper, we want a so-called super moon. Because the circling around the earth is done on an ellipse, the moon is sometimes closer to use than other times. Being closer means a bigger image and thus more details. Super moons are full moons but the full moon has little contrast. This is why I went for a phase. The contrast around the terminator, the day/night border, is always nice, and high contrast helps with the appearance of a sharp shot.

If you do your first moon shooting just at the perfect night, you are likely to overlook something so you get less than optimal results. The result used for this blog was taken with about five shootings worth of experience. First I got experience with my 70-300 mm, when I had the chance to borrow a Tamron 150-600, I could apply all the routine and instantly get some good results.

In each of moon-hunting nights, I took several series of 9 photos each, with re-positioning the camera after each series. Quite some work especially if it is cold outside. But that is the main ingredient of that photo.

Select the photo

You now have a lot of photos looking all alike. Review them in 1:1 zoom to cull the baddies. For the remaining pile, compare if you can delete further images.

For those shootings I used a D5600 (sadly, the live-view broke later in 2019) and a D7500. With the D5600 having more resolution, one would expect more details. But somehow I almost always get clearer, more detailed results with the D7500. Resolution seemingly is not everything.

However the shot used in this blog was made with the D5600, because I don’t want to suggest you should upgrade your camera just to get a little edge for a couple of moon photos.  I also don’t go into stacking, that is the use of multiple exposures which are aligned and then averaged for a final image which has more information and therefore allows more post-processing.

First work on the photo

Some, but not all Raw editing tools offer to compensate for lens distortion. For this project I disable it because we don’t want have the image stretched and squeezed, reducing details just to get a slight geometric distortion corrected. I used the automatic color fringe removal though.

First, crop. You want to show the moon, not the empty space. After cropping, adjust brightness levels. First, adjust the white point, that is, stretch the histogram so that white almost but not quite touches the max level. You might also want to adjust the black point. Accept some clipping here, we want to clip the noise in the black.

In order to reveal details in the bright parts, use a function to recover highlights and/or play with the tone curve, that is a curve showing how input brightness translates to output brightness. We are not going for full realism, because to the eye the moon surface is very bright without a lot of texture. We want to use a greater range, that means we show most of the moon in moderate brightness so that we can stretch the image representation over a larger range of brightness levels from medium-grey to white instead of bright-grey to white only.

Do only basic adjustments now, we worry about the final touch-up later. But now would be the time to check if there are color fringes on the edge of the moon. If your program has no automatic correction, you can reduce overall saturation. A more complicated fix is to reduce saturation just for that color fringe hue. or to manually mark the border and then reduce saturation locally in that marked area.

This is what I got now:

Reveal the details

Set sharpness strength to the max and change the kernel size to see how it affect the image, until you get good crater edges. For this example I kept the max strength while using a kernel of 1.1 pixels. I also used a mask threshold of 20%. That means, low-contrast areas get no sharpness applied. They would not benefit much anyway and we don’t want unnecessary noise amplification there.

Now export the image with downscaling. I downscaled the 1342 pixel edges to 1000 pixels. This gets us less pixels but more information for every remaining pixel. This is where at now:

This version is the one we continue to work on. Now we add even more sharpness! I went with max strength again (150%). Kernel size now smaller because we go for the fine details, I used 0.7 pixels. Masking threshold quite high, 59%, to keep the maria clean. A mare, Latin for sea, is a large dark area filled with frozen lava, in earlier times believed to be actually seas.

We can add this extra sharpness without producing too much of artifacts because of the previous downscale. Now I have this:

More adjustments

I now correct the histogram again in order to get more punch, also use a selective saturation slider to get some color amplified. The effect is subtle but you notice that on the right part, one of the dark areas, Mare Tranquillitatis, gets a blue or purple tint. For more oomph I also added filters which add local contrast, that is they adjust the turne curve not just for the whole image and instead check for the surrounding brightness. If something is dark and the surrounding bright, such filter makes the dark area even darker, and vice versa. I added some more sharpness, with the smallest kernel available (here: 0.5 pixels.)

I also then applied noise reduction, masked so that only low-contrast area get denoised. I then manually marked areas of craters in the maria, and locally added more sharpness to have them stand out. Finally I changed overall brightness because why not? The result was posted at the top of the article.

Other ways

There are a couple of commercial tools around, some claim to be AI-based. The ones I tested are not intelligent enough for best automatic settings but when finding good parameters for a given photo, the clean-up-work is good, enhancing details and removing noise at the same time. The primary advantage is that if such tool detects an edge, it seemingly re-draws it with internally higher resolution, which results in great distinct single craters. I used this several times for postings on Facebook.

The downside is high-frequency content. The part of the moon with many overlaying craters get artifacts. I doubt that many ever notice, but having watched the moon through a telescope at different phases, I personally do notice.

A better camera sensor seems to help as well. The D7500, while having lower resolution, gives me clearer detail and less noise. Finally, if you have the time, using a stacking approach to combine similar exposures to a super-image can get you more options for processing and thus more detail as well.

This blog entry shows that even without all that, one can get a detailed depiction of the moon – that is, if one has access to a long lens.