Category Archives: X100F

Fuji’s film simulations and the X100F

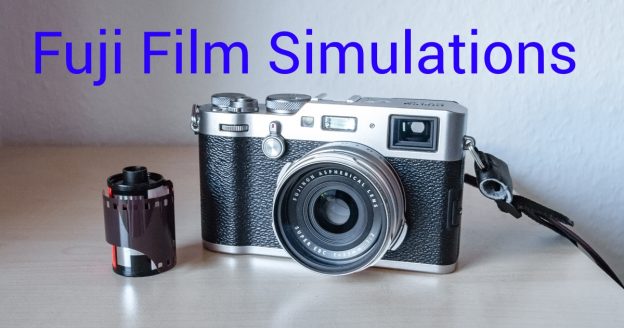
The film simulation feature is available in many Fuji cameras. This blog provides the X100F perspective as that camera is my only Fuji.

I shot on 135-format film for some years, using a Samsung compact. Agfa and Kodak films were the brands I used the most. Once or twice I bought a Fujicolor roll, but don’t remember which type. This blog cannot comment on how close the Fuji film simulations come to a particular film, but I think it is safe to assume that exact reproduction was not the goal in the first place. That would limit the capability of today’s image sensors.

Simulating outdated technology?

Calling Jpeg profiles “film simulations” has some advantages for Fujifilm:

  • A camera review could criticize an altered image output because it is not accurate. With calling the output a film simulation, the company can say that neutral reproduction is not the goal anyway.
  • The manufacturer can use actual film brand names for the simulations and utilize this in marketing in order to improve the perceived quality and tradition of the camera.

Theorizing about this feature might be fun, but I like to look on the practical side.

When things are black and white

Even monochrome film types are simulated. Sepia is an option I practically never select. I also find little use for the standard monochrome simulation: Texture can be a bit soft, which could be helpful for certain portraits, but shadows are too dark for my taste.

The Neopan Acros simulation is different, with superb brightness gradation. Texture resolution is insane, though images are always a bit noisy. But it is difficult to tell if that is already noise, or still detail. The noise can also be considered dithering to get more apparent levels of brightness than possible with 8-bit pixel depth.

Both standard monochrome as well as Acros simulations are also available with a digitally applied Yellow, Green or Red color filter. The yellow filter can create nicer portraits. The green filter emphasizes freckles which looks good depending on the model. The red filter darkens a blue sky for dramatic landscape impressions. I usually prefer the non-filtered image.

Color film simulations

Pro Neg Standard shows natural contrast, the colors are not overdone either. I seldom use this simulation but when I need it, I am glad it is there. It can be selected in dimly lit rooms as this image shows, because dark parts are still visible.

Pro Neg High has much darker shadow tones and more color saturation. Skin is still a bit pale, color still not overdone, and the images have a premium appearance. I save this simulation for when I am a wedding guest. I am not sure if the Pro Neg High version is based on a different film type than Pro Neg Standard, or if the camera just applies some enhancements a typical customer would like to see. For portraits with Pro Neg High, I set the shadows to -1, making them brighter.

Classic Chrome looks quite different. Color is subdued, with a distinct representation of blue and brown colors. I think the secret of Classic Chrome is that it does provide a traditional feel. Every photo, even if shot yesterday, looks like a document of history. I am not sure how this simulation is implemented. Simple desaturation does not get one the Classic Chrome output. It looks a bit as if the monochrome part of the image information was processed separately, allowing very good brightness-based detail resolution, but I don’t know how it is actually done. This simulation is on my shortlist when I visit cities or old buildings.

The Astia/Soft option is not soft, but other simulations are harder. I sometimes use Astia for landscape or gardens. Images can get a yellow cast, which makes it not the optimal choice for portraits. I like the contrast curve of Astia, with the shadows not too dark.

Velvia/Vivid has loud color and dark shadows. Velvia images are borderline exaggerated and don’t try to get a mathematically exact representation. But a sunset looks quite scenic. Cities at night can look good, too. Generally I like to use Velvia for short photo series when each one of the few photos has to make an impact.

A good standard

Provia/Standard is the best film simulation in my opinion, because it can be used in almost any situation with satisfactory results. Even though called “Standard”, Provia is not neutral. The color and especially green is bit too saturated and shadows can be too harsh. Blue colors can have a slight purple tint, which balances the deep green. All this supports the robust appearance. If you remember film prints for the average consumer, those also tried to impress with increased contrast and slightly oversaturated color. Provia seems to be a remembrance of that.

Color set to -1 provides a more realistic output. Tackling the shadows is difficult. The Provia shadows are generally helpful to provide a sense of depth. But if some part of the image is brightly lit while large parts of the image are in the shadow, this approach fails as too much of the image gets too dark. A -2 shadow setting can result in a washed-out look which is especially problematic when photographing grass or foliage. Normally I use -1 as shadow configuration.

Instead of playing with the highlight setting. I prefer to increase the dynamic range. The auto-range mode selects either 100% or 200% depending on the image, 400% is available as a manual setting. Shadow parts might get a bit noisy, but it saves highlights from overexposure. My favorite dynamic range setting is the auto option.

This image was shot with Provia default settings. Not bad for iso 12800, I would say.

Choosing a simulation

When I just want to take a photo without having to think about specific image settings, I use Provia. It provides nice results for landscape, and cities, and portraits, too. Inside a house or outside, on a beach or on a mountain, old men or young ladies, the Provia simulation covers it.

Thinking about other “film” properties beforehand helps to make up the mind: What do I try to get? Realism or expression? A natural look or romantic mood? Do I want to convey information primarily with color, or with lightness? Once this is clear and the camera accordingly set, it is easier to approach subjects and take a photograph with confidence.

Using one configuration for the whole shooting results in a coherent look which is helpful to tell a story. I find this more important than having individually perfect images.

As the Jpeg format limits post-processing options, post-edit sessions are automatically shorter. I use the free time to think about photography instead of honing my skills as a digital artist.

Does the X-Trans sensor help?

Not all, but many Fujifilm camera models including the X100F use sensors with a non-standard color array. Fuji labelled that “X-Trans”. Claims of better resolution seem arguable, I would say that there are certain advantages, but X‑Trans might not necessarily be better overall.

However one has to give Fuji this, they thought the film simulation feature through. Ordering the X-Trans color mask not as regular as on a standard sensor is a bit closer to chemical film which has a fully random distribution.

Using an X-Trans sensor implies a different algorithm to demosaic the image, and to deal with different artifacts. The result could be closer to analogue film. This effect should be small considering today’s sensor resolutions, but it shows that Fujifilm’s effort to get a more film-like output is more than just a software trick.

The good look of high-iso images appears to be supported by quite strong color-noise reduction, removing small color details in high-iso images for the benefit of brightness resolution. This trade-off could be viewed as part of the film simulation.

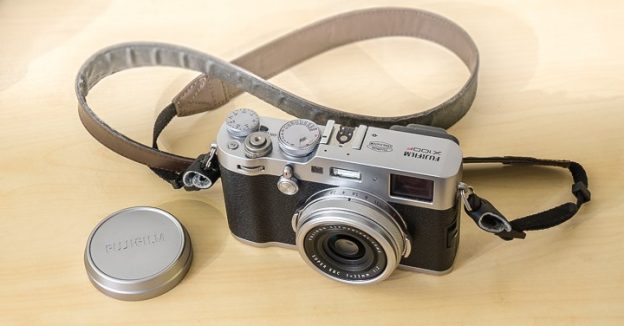
The X100 series uses a fixed prime lens which has some small issues in certain circumstances, and even those contribute to a look known from the film age.

Getting colors right

Auto white-balance can be off when one is surrounded by green nature. That will cause a purple tint. Experiments during a shooting with a different white-balance can take longer than doing corrections later in the post-processing. If one plans to use the image straight out of camera, it is good to know when to use which white-balance mode. When in doubt, I switch to auto white-balance.

The effect might be subtle, but monochrome images are affected by white balance, too. For color images, white balance shifts can be used as a creative tool, but I prefer colors which look right.

Provia, Pro Neg, and Classic Chrome provide pleasant skin tones, with smaller skin issues gracefully softened. I find the skin rendering so good that I do people photographing mostly with Jpeg just because for little effort one gets quite good results.

When comparing a film simulation Jpeg with the Raw file, it becomes apparent that the camera’s Jpeg has not the full possible range of nuance. But the slightly reduced palette often supports visual communication. This is an Classic Chrome example:

Skipping post-edit sessions

Why would one pay 1400 Euros for a camera if one is not going for the best possible image quality? This was my thinking until lack of time let me ask: Why did I pay so much if I have to develop, or at least optimize all photos after a shooting?

For prepared portrait sessions I of course take the time to work on the photos, using Raw in order to keep all options. The last wedding where I was invited as a guest however I shot with Jpeg-only (Pro Neg Hi, Shadows -1). No-one complained about a few overblown highlights, everyone liked the overall appearance.

For everyday’s photographing, a Jpeg is good enough and post processing can be kept very brief. This includes travel photography where I now like to use photos out of camera with no edits whatsoever. It takes time to get the experience necessary to minimize waste. But it also takes time to learn how to use image editing software, so either approach takes time. However, the post-edit approach takes time after each shooting, while the learning-to-use-camera-Jpegs approach, once mastered, can be used with then no further time involvement, or at least reduced time consumption as edit session can be then very short.

Other camera makers provide nice Jpeg images as well. As a matter of personal taste, I like the Fuji “film simulation” rendering a lot, where the camera does a lot of useful post-processing automatically for me. Doing little or no edits afterwards means to give up some control, but it also means to enjoy the photos with less delay.

That approach has obvious limitations, but some advantages as well:

  • Keeping the Jpeg settings the same throughout an event ensures that the series has a consistent look.
  • No post also means no cropping. One has to consider image composition more carefully. This could lead to better photographs, but the main advantage is that I look at the world with more attention. And return with more and clearer memories.
  • Beside image composition, using exposure compensation when shooting in twilight takes more time as well. But it is a lot of fun taking photographs without piling up work for later when coming home.

Learning to accept small imperfections which could be easily edited out, was the hardest part for me. Now that I do some portion of my photographing with straight out of camera Jpegs, I feel that is is useful to learn to focus on more important things before worrying about possible small mistakes.

Except for the headline image, all photographs in this blog are created using only the camera.


How good is the X100F lens?

Reason wanted me to be smart, but I bought an X100F on the release day in 2017. Am I happy that I spent 1400 Euros, plus several hundred more for accessories? This is a camera with a fixed lens, which cannot even zoom.

Some things are not as good as hoped for. My main criticism is the autofocus miss ratio. The camera sometimes confirms the focus while in fact the whole frame is blurry. I rather check the focus before taking an important photo than accepting the small risk of spoiling it.

In many other regards, like the X100F. The camera looks fantastic and is easy to use and satisfying to operate. The highly configurable viewfinder is something did not expect from a compact camera.

What about the lens?

Perfect output versus having a soul

The lens has a couple of small issues, most of them are not relevant in the everyday routine. If those issues come into play, it is easy to work around most of them. But why always produce technically perfect, bloodless images? The optical properties of this lens can add something.

An X100 is prone to flare issues and internal light scattering, sometimes when the sun is not even in the frame. But there are cases where those issues result in atmospheric images. This example shows only some of the many possible artifacts. It is up to the photographer to avoid, or to employ them.

A distorted view

Every X100 image has some geometric distortion, which is not corrected in the camera. Architecture with straight lines can reveal these issues, especially close to the frame edge. As a solution, one can use third-party software. Lightroom 6.9 or higher for example comes with a lens profile for X100F raw image files. The profile is not available for X100F Jpegs, but a Jpeg seems to be corrected quite well with Lightroom’s “Sony DT18-200” profile. As alternative, the distortion slider can be set to +5, with “Constrain Crop” applied.

The distortion is so small that in most case I don’t correct it. It can even be helpful in order to compensate for perspective distortion near the border. That kind of perspective distortion would be mathematically correct, but is not flattering for people near the frame edge, as the person’s body and the head get bent a bit too much. The X100F lens provides a less accurate, but better looking image in this special case.

Point light rendering

As the X100F has no image stabilization, it can be difficult to use it at night. But in a city it is possible to get acceptable results operating the camera hand-held. Depending on the aperture, point lights looks different.

The aperture effect also depends on the brightness, this example uses a quite bright light.

The corona at f/2 is often partly cut-off and I try to avoid it. f/2.8 deals with many artifacts. With f/4 one gets new artifacts, but the spikes are rather nice. Using f/4 often means to compromise the iso value if used hand-held at night. But when this kind of spiky point light is preferred over the f/2.8 rendering, this trade-off is available.

Dimmer point lights might show no corona at all, making the full f/2 aperture usable in some cases even at night.

Chromatic aberration

A single lens element has a given focal length for just one wavelength. Other wavelengths, meaning other colors, will focus somewhere else. Using multiple elements with different properties, one can bring a wider spectrum to the same focal length, but there are trade-offs: Every element makes the construction heavier, bulkier, and more expensive.

As a result, some color fringes are still visible on high-contrast edges. The camera’s Jpeg engine automatically removes smaller chromatic aberration artifacts, but is not aggressive enough to remove all possible color fringes.

For a lens of this size, the aberration is very well controlled and only appears in high-contrast situations and predominantly in edge areas of the frame. Fringes can be removed later on a computer, but I prefer higher f-numbers to avoid, or at least reduce color fringes in advance.

Bokeh quality

The outer edge of bokeh disks is a bit too pronounced. This is bad when sun shines through tree leaves, as the bokeh now generates a busy pattern. When there are just some light sources in the background, the same effects helps to create a nice background.

The X100 cannot provide a perfect, creamy appearance. And to reiterate, certain backgrounds lead to a busy pattern which is bad-looking. But in many circumstances the lens helps to get usable background separation with a pleasant representation of out-of-focus areas. Of course this is a subjective matter, but I like how out-of-focus parts look.

No real macro lens

In close range and with open aperture, the entire image gets soft, loses contrast and appears hazy. This limits open aperture usage in a focus range below 1.5 meters.

In some cases this can still be useful. Applied to the maximum, one can create a dreamy look. This effect quickly wears off and therefore is not a style choice one can use often, but the option is there getting this through the lens instead of a digital filter.

Applied just a bit, for example using f/2.5 for head-shoulder-portraits, the effect is just strong enough to hint at the dreamy look while also helping a bit to conceal some skin issues – lowered contrast can have its use. There is additional sharpness loss in the outer parts of the image, this helps to lead the attention to the center. If one is lucky, this ‘issue’ gets one a gracious portrait.

For best overall sharpness I use apertures in the range of f/5.6 to f/7.1. This is based on experience, not on measurements, please take that with a grain of salt. Even then, the corners of the image are not completely sharp. While the lens otherwise resolves enough detail for a 24 megapixel sensor, I would say that the X100 lens cannot compete with full-size lenses in terms of technical performance.

It is a compact design with good performance where it matters. Macro-wise, one can get as close as 10 centimeters to an object, measured from the outer lens element, but in order to get a usable image, one has to stop down. This is nowhere near the macro capability of a typical compact or bridge camera, but still not bad.

Practical concerns

Because the lens consists of only eight elements, we can assume that the loss of light is proportionally small. In most cases, the lens just performs. In more extreme circumstances, one needs a bit of experience to either avoid optical artifacts, or to use those to create a particular effect.

The X100F lens is the same construction as found in the original Finepix X100. If perfect lens output could be achieved while staying within the size, weight and production cost boundaries, I guess the Fujinon engineers would have done that. I think it is safe to conclude from observation that the X100 lens was not designed for pixel-peepers. Instead it was made to offer a versatile tool in a small package.

Conclusion

Do I wish for a new lens design? Except weather sealing, no, I don’t know what it is, but the lens has it.

Even with optimal settings, photos are not flawless, but the X100 imperfections usually lead to a traditional photographic look. This might be a reason for liking those images.

The X100 results are better than one would expect of a lens of this size, this could also add to the reputation if only because one has lower expectations.

But the real reason for the X100 ‘magic’ is this: The camera is fun to use and therefore used often, producing more lucky hits.

Fixed Prime Lens: Limitation and Liberation

The main restriction of the Fujifilm X100F is the non-interchangeable prime lens. This article is an opinion piece and summarizes personal experience after more than 10000 exposures.

The typical cellphone camera offers a wider field of view than the X100 and is good for photographing a group of several people. A classic still camera on the other hand often has a lens attached with a bit more magnification. This classic field of view is useful for portraits of a single person. The X100F lens is in the middle. That means it is useful for taking pictures of small groups.

I am not a professional photographer, my photography is not about commercial success. It is about having fun.

Getting more or less field of view

The X100 lens provides a moderately wide angle. To cover more area, the build-in panorama function can be used. Alternatively one can take overlapping images and use software to create a panorama on the computer. Of course, there should be no movement in the frame. I take a photograph of the center first and then cover the edges with some overlapping portions in order to provide good guidance for panorama-stitching software. An alternative would be the optical wide converter which offers a field of view like a cellphone camera. The stitching approach allows an even wider angle of view – if one wants to spend time on a computer for that.

Getting closer instead is easy, because the X100F has a build-in digital zoom. For higher quality I prefer cropping on the computer. One can cut out a part which would be almost equivalent to the aforementioned classic field of view of traditional still cameras, and still get an image which fills the height of a 5K monitor (2880 pixels in height.) For portraits, photographers often use more magnification. When we use the a frame in portrait orientation, cropped also to the image height of a 5K monitor, it is possible to get the typical portrait field of view. With a resolution good enough for 16×24 cm prints.

Now some numbers: Using the 5K-monitor height cropping (2880 pixels height) in landscape mode, we almost get “50 mm equivalent” focal length, in portrait mode we get the equivalent of some 70 mm. Using the optical tele converter results in 1.4x magnification on top of that.

Accepting the frame

I would be too lazy to carry optical converters with me, so I didn’t by them yet – to my regret when I visited a yacht harbor. Some wide angle shots would look impressive, but then I looked around what would be possible with the given field of view.

Using a prime lens saves time: No more adjustment of the zoom factor, also no thinking about zoom. The naked eye cannot zoom, likewise this camera. While restrictive, it also feels natural.

Having a non-interchangeable lens also takes away choices before leaving the house, there is no thinking about which equipment to grab. The replacement battery has to be charged, then one can take the X100F and is ready. During the trip, no time is needed to change lenses.

Instead of looking for details like a far-away church spire, I now experience the environment more as as whole. The moderately wide angle of view helps to keep the photos more honest: If I have a photograph of it, I was there.

With this field of view, there is usually not too much perspective distortion. This adds to a more realistic, documentary-like result. If the place allows it, I like to walk a bit in order to get to a better position. This takes time, but it is time well spent as I experience the location. And think about a good angle and a good frame.

Experience through experiments

Because of the moderate focal length, bokeh options are limited as well. An uninteresting background cannot be easily turned into beautiful bokeh, instead one has to consider the background.

As a wedding guest, I took only the X100F with me. The ceremony was shot by the official photographer, after that I could experience the party, while getting in close range to take my photos. The lightweight equipment allowed to move quickly. With the focal length no longer to worry about, meaning less time spent configuring the camera, there was more time to interact with subjects.

I also use the camera on travel. That felt like jumping into the cold water: Should I consider myself good enough to do this without flexibility in focal length?

In order to get to the extreme, I once used unedited Jpegs. Only the vision provided by the camera was available, but my sight adapted accordingly. It felt like gaining a new ability.

Of course, it still happens that I struggle to find a good frame. Surprisingly few things cannot be photographed in any useful way with this camera, but occasionally the prime lens is too limiting. On the other hand I discovered a lot of possibilities which I previously overlooked.

And I found an immutable focal length quite helpful for galleries: This is the frame in which I tell my story.

Just the beginning

Stitching and cropping is of course still available and can be useful. With the restriction of having no zoom, I thought I would use computer editing more, in order to work around the camera’s limitation. But in reality I often do less in post, perhaps because I take more time before releasing the shutter.

Instead of thinking about what else I could buy to complete my gear, I am thinking about how I can make it work with what I got. Technical perfection might not be achieved using the X100F, but other things are more important. Do I have an idea how to photograph something? If I do a portrait, do I find it interesting and worthwhile to take my time, can I connect with the non-professional model, can I get close with the camera?

As of now, the camera often does not provide all I want, but as it turns out, all I need.